The responsibility of a software developer is to “deliver stakeholder value”

The responsibility of a software developer is to “deliver stakeholder value”.


Stakeholders are people and business.

We are tasked with creating things that provide positive value to those who commission it (the business) and use it (the customer).

Our responsibility and priorities are the following 3 tenents of software development:

Security: Ensuring the software we develop does not harm the business or customer, either directly or indirectly.

Usability: The customer can effectively discover, learn and usability the software in the easiest, most satisfying way possible. It should bring calm and cause a smile.

Sustainability: Ensuring once the software has been created it can be easily and effectively maintained into a long and unforseeable future. That includes ensuring it is cost effective, upgradable, extensible, buildable and deployable.


Software development is not about playing with technology.

It has nothing to do with language features, tools or frameworks.

Learning and change are not the reason for doing the work.

Cool should only apply when we find a way to improve on one of the tenents or delight a stakeholder.

Methodology, patterns, practices and paradigms are irrelevant if they don’t fit the tenents.

[videos] My first software training videos: Hoisting and Closures in JavaScript, and the MVC pattern

I recently needed to create 3 short software training videos for a software development training role I was applying for.

These are the first training videos I’ve ever created and published. I did my best to research the topics (even though I’ve worked with them for years) and try to present in the simplest way possible with examples. It’s not my finest work, but I am just getting started.

Hopefully someone finds them useful.

Any feedback is welcome at jason@jsnelders.com.


Hoisting in JavaScript


Closures in JavaScript


The MVC Software Pattern

Software Development: Build, to Fail. Fail, to Learn. Learn, to Succeed.

The only way to learn as a software developer is to build.

Today I started my third major application using VueJS and realised there was a better way to approach something I’ve done in the last 2 applications.

As a mature developer you must continually question and re-evaluate what you know. Keep looking for better and easier ways achieve a result, and choose to discard those that don’t suit.

I’m not ashamed to say my last 2 approaches where inadequate. It took that time, different searches, and re-framing of the problem to eventually reach the point I needed.

But coming from a Microsoft development background I’ve had a career living the philosophy: “don’t implement until version 3” (which is to say, wait until version 3 before you get it right).

In all my years I’ve never seen a developer get it “right” the first time.

Maturity is recognising success takes time and working through the process.

PHP: Recursively zip a folder/directory structure

Status: Draft (31 May 2019)

This is a work in progress. I want to record my working as I go.


What I Want

I need to zip a folder structure – ultimately, theme and plug-in folder in WordPress – using PHP.

I’m currently developing and testing on a Windows 10 PC. Ultimately it will need to work in Linux (Ubuntu), but the first step is to it working in Windows.

I started with solutions from https://gist.github.com/MarvinMenzerath/4185113/72db1670454bd707b9d761a9d5e83c54da2052ac and https://stackoverflow.com/questions/1334613/how-to-recursively-zip-a-directory-in-php but the zip file was being created, however, not files were added.

I realised the problem was the relative path for folders/files within the zip. My solution below is a modification of the referenced solutions, where I strip the source path from the fill file path of each folder and file to give the relative path to the source.

So far this works in Windows, next step is to test in Linux. I’m actively working the problem so stay tuned.


I created a file “D:\Temp\php\test_zip.php” with the code below.
I execute with the following command (I have XAMPP installed with includes PHP): “D:\Temp\php>D:\xampp\php\php.exe test_zip.php”.

The Code

(Aide: I used https://www.freeformatter.com/html-escape.html to convert raw PHP code to something I can past in between <pre> tags in the Classic WorPress content editor).

<?php
// Make sure the script can handle large folders/files
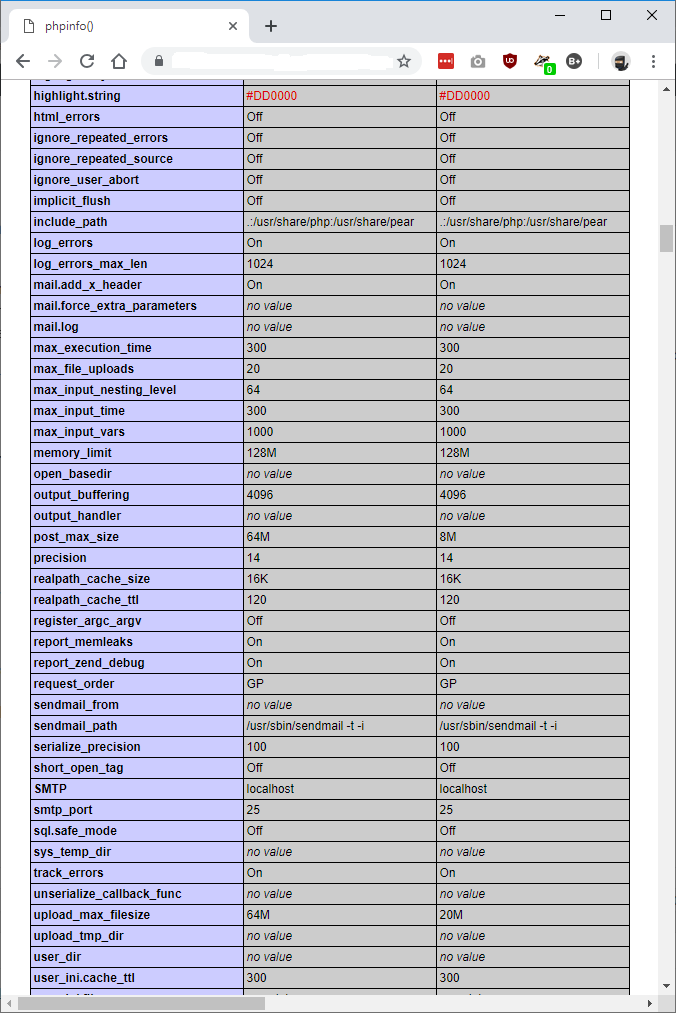
ini_set('max_execution_time', 600);
ini_set('memory_limit','1024M');

// Start the backup!
Zip('D:\\Temp\\php\\Source\\', './compressed.zip');
Zip('D:\\Temp\\hildas_prod_logs\\', 'D:\\Temp\\php\\backup-test.zip');
testOne('D:\\Temp\\php\\Source\\debug.log', 'D:\\Temp\\php\\compressed_testOne.zip');

echo "Finished" . "\n";


// A quick, reduced test.
// This works in Windows.
function testOne($source, $zipTo)
{
	$zip = new ZipArchive;
	if (file_exists($source) === false)
	{
		echo "Sourece does not exist" . "\n";
		return;
	}
	
	if ($zip->open($zipTo, ZIPARCHIVE::CREATE) === true) 
	{
		$zip->addFile($source, 'source\newname.txt');
		$zip->close();
		echo "OK" . "\n";
	} 
	else 
	{
		echo "FAILED" . "\n";
	}
}


// This works in Windows.
// Source and inspiration: https://gist.github.com/MarvinMenzerath/4185113/72db1670454bd707b9d761a9d5e83c54da2052ac - Marvin Menzerath. (http://menzerath.eu)
// Additional source and inspiration: https://stackoverflow.com/questions/1334613/how-to-recursively-zip-a-directory-in-php
function Zip($source, $destination)
{
    if (!extension_loaded('zip')) 
	{
		echo "Zip extension not loaded\n";
        return false;
    }
	
	if (!file_exists($source)) 
	{
		echo "Source not found:" . $source . "\n";
        return false;
    }

    $zip = new ZipArchive();
    if (!$zip->open($destination, ZIPARCHIVE::CREATE)) 
	{
		echo "Zip not created or opened\n";
        return false;
    }
	
	$raw_source = $source;

    $source = str_replace('\\', '/', realpath($source));
	
	echo "Raw source: " . $raw_source . "\n";
	echo "Clean source: " . $source . "\n";

    if (is_dir($source) === true)
    {
        $files = new RecursiveIteratorIterator(new RecursiveDirectoryIterator($source), RecursiveIteratorIterator::SELF_FIRST);
		
		$sourceWithSeparator = $source . DIRECTORY_SEPARATOR;
        foreach ($files as $file)
        {
            $file = str_replace('\\', '/', $file);

            // Ignore "." and ".." folders
            if( in_array(substr($file, strrpos($file, '/')+1), array('.', '..')) )
                continue;

            $file = realpath($file);

            if (is_dir($file) === true)
            {
				$dir_path = str_replace($sourceWithSeparator, '', $file . DIRECTORY_SEPARATOR);
				
				echo "Directory: " . $file . " (Path: " . $dir_path . ")\n";
                //$zip->addEmptyDir(str_replace($source . '/', '', $file . '/'));
				
				$zip->addEmptyDir($dir_path);
            }
            else if (is_file($file) === true)
            {
				$zip_relative_path = str_replace($sourceWithSeparator, '', $file);
				
				$zip_relative_path = remove_from_start($zip_relative_path, $raw_source);
				
				echo "File: " . $file . " (Path: " . $zip_relative_path . ")\n";
                //$zip->addFromString(str_replace($source . '/', '', $file), file_get_contents($file));
				//$zip->addFile($file, str_replace($source . '/', '', $file));
				$zip->addFile($file, $zip_relative_path);
            }
        }
    }
    else if (is_file($source) === true)
    {
        $zip->addFromString(basename($source), file_get_contents($source));
    }

    return $zip->close();
}


function remove_from_start($full_string, $prefix)
{
	if (substr($full_string, 0, strlen($prefix)) == $prefix) 
	{
		$full_string = substr($full_string, strlen($prefix));
	} 
	
	return $full_string;
}

?>


WordPress Shortcode: “Show If” for conditional content display

Here’s the code for a simple WordPress shortcode to conditionally display content within pages based on supplied usernames or roles.


Example Usage

Display to a specified user:


Display to a specified role:


Display to both a user and a role:


Display to multiple roles (comma separated list. “username” works the same):


Code

It’s in a GitHub gist at https://gist.github.com/vylesk/64ca3e6d3da77fb853ca7af181165e6b and below:

<?php
/**
* Plugin Name: "Show If" Shortcode
* Plugin URI: https://jsnelders.com/
* Description: Shortcode to conditionally display content if the user is in a specified role or has a specified username.
* Author: Jason Snelders
* Author URI: http://jsnelders.com
* Version: 190529.1
**/

namespace JasonSnelders\Shortcodes;

/*
*	Show the content only if the current user is one of the specified username(s) or in one ofthe role(s).
*
*	Attributes:
*		role: comma separated list of allowed roles to view the content.
*		username: comma separated list of allowed usernames to view the content.
*
*	Attrubtes combine as an OR expressess - content is displayed if they user is in the "role" list OR the "username" list.
*/
add_shortcode('show_if', 'JasonSnelders\Shortcodes\show_if_handler');

function show_if_handler($atts = [], $content = null)
{
	
	// Get supplied shortcode attributes.
	$show_if_role = "";
	$show_if_username = "";
	if(isset($atts["role"])) $show_if_role = $atts["role"];
	if(isset($atts["username"])) $show_if_username = $atts["username"];
	$show_if_role = explode(',', $show_if_role);
	$show_if_username = explode(',', $show_if_username);
	
	
	// Get the current user.
	$wp_user = \wp_get_current_user();
	$wp_user_roles = $wp_user->roles;
	$wp_user_username = $wp_user->user_login;
	
	// Check if current user can view content/
	$show_to_user = false;
	
	foreach ($wp_user_roles as $role_slug)
	{
		if ($role_slug != "" && in_array_case_insensitive($atts, $role_slug))
		{
			$show_to_user = true;
			break;
		}
	}
	
	if ($show_to_user == false)
	{
		foreach ($show_if_username as $show_username)
		{
			if ($show_username != "" && strtolower($show_username) == strtolower($wp_user_username))
			{
				$show_to_user = true;
				break;
			}
		}
	}
	
    
	ob_start();

	if ($show_to_user == true)
	{
		// Show the content
		$content = do_shortcode($content);
		echo $content;
	}
	else
	{
		// Hide the content
		echo "";
	}

	return ob_get_clean();
}


/*
*	Case-insensitive check if a value is in the array.
*	(Source: https://gist.github.com/sepehr/6351397)
*/
function in_array_case_insensitive($array, $check_value)
{
	return in_array(strtolower($check_value), array_map('strtolower', $array));
}
?>

The thing about micro-services

You might decrease the complexity of a monolithic application (I’m not actually sure that’s even a valid statement, that a “monolith application” is “complex”) but conversely you increase the complexity by adding in all the network hops, latency, asynchronicity, and having to debug strange timeout errors.

It doesn’t matter what architecture you user, you’re still going to encounter an equal number of problems to think about, debug and solve.

WordPress: Changing File Upload and Processing Sizes

[This is a post for self-reference]

Up front I’m going to say I got exactly the help I need from here: https://www.wpbeginner.com/wp-tutorials/how-to-increase-the-maximum-file-upload-size-in-wordpress/.
The author of that post deserves all my credit.

I’m creating this post to summarise it in my own words and to give it a little educational context.


When allowing file uploads on a website there are 3 big things you need to think about:

  • The size of each file.
  • The total size of all files in an upload.
  • The time it takes to process the upload.

Actually, there are a couple of things to consider that are worthy of mention but I won’t cover in this post:

  • Asynchronous uploads (AJAX as we used to call them) can change the figure of an upload, because instead of uploading multiple files at one, you upload one file at a time (even if they are in parallel) so the “total size of all files” number will be different.
  • Tell users about the limits they face before they upload. Also, when uploading images a bit of guidance around things like “27MB images are a stupid side for most sites because 27MB isn’t going to be better than 7MB, and the site will trim the size down to a couple of hundred KB at most anyway.”
  • Trap, log and respond to any errors. This is on my mind because WordPress/PHP seems to like gobbling errors and not telling anyone about it (I’m in the process of hunting down how to handle this and will be a topic of another post).


There are 3 main ways in PHP to affect file upload sizes and times:

  • @set_init() in a PHP script itself.
  • php.ini file
  • .hataccess file.

Be aware, as a PHP/Linux novice I reckon there are other defaults and hierarchies that come into play.
This article is spawned by a situation where I was changing php.ini without realising .htaccess had a value overriding it.


How do you implement these values?

This is where I rip from the wpbeginner site I mentioned above for quick reference:

1. PHP script file (e.g. functions.php in WordPress themes)

@ini_set( 'upload_max_size' , '64M' );
@ini_set( 'post_max_size', '64M');
@ini_set( 'max_execution_time', '300' );

(I haven’t tried this approach yet, but I have used @ini_set() in other instances (e.g. ‘memory_limit’) and it’s worked well.

2. php.ini

upload_max_filesize = 64M
post_max_size = 64M
max_execution_time = 300

I’ve used this approach in development and it did the trick.

3 .htaccess

php_value upload_max_filesize 64M
php_value post_max_size 64M
php_value max_execution_time 300

Before writing this post I had to fix a production issue and after trying php.ini I got lucky and discovered .htaccess was where the value was coming from.
So the moral: .htaccess overrides php.ini.

Also, I did not need to restart apache for this change to take affect.


DISCLAIMER: I haven’t actually read in-depth how all this works. I’m a typical developer who expects other people’s shit to work, and when it doesn’t I’m usually in the middle of my own concerns so it’s a case of “search and scan by keyword until someone else’s solution works for me”.
Such is this age of software development.


Need to know what your current settings are?

It’s helpful in debugging and verification to know what your actual PHP settings are so you know what your starting point is (and  you have a number to search your files for).

A good way is to call phpinfo();.

For example, create a file in your site (I call mine info.php) and add the following PHP code:

<?php
phpinfo();
?>

You should see something like the following when you run it. This screenshot shows some output from the section titled “Core”, and the 3 columns are (from left to right): “Directive”, “Local Value” and “Master Value”. I can say from experience the “Local Value” is the one that matters.

phpinfo() output

Bad UX: Microsoft Films & TV

This is a UX failure I experienced.

My default media player in Windows 10 is Microsoft’s “Films & TV” app. So most .mp4 or .mkv files I have or produce I play through this app.

The problem is, if my focus is on the app and I press the backspace button (which can happen if I’m working and switching between multiple screens), I go from a playing video to the following:

So, where the UX fails and I become lost is: how do I get back to the file I was just playing?

There is nothing on the screen that indicates this possibility.
And exploring the few extra options (including a back arrow that only appears after moving between “Explore”, “Purchase” and “Personal”) yields nothing.
In the end I have to go back to Windows Explorer and re-execute the file.
(Now I think about it, the application doesn’t even have a typical “File” menu to find and open a file directly.

I call this a fail because I cannot simply “go back” to the file I was playing.
I would expect this from a default operating system application in 2019.

Software Development Estimation (and breaking through The Planning Fallacy)

Everyone involved in software development sucks at estimating the time to complete tasks.
Developers. Analysts. Even project managers.

I recently heard a very really simple solution for this problem on a podcast that was discussing The Planning Fallacy.
The solution:

Multiply your estimates by Pi (3.14)

I’ve tried this a few times over the last week and it actually works.
My estimates are finally starting to match reality. And this includes such simple things as writing and responding to emails.

There’s only one problem – that’s jot really a problem – is:

Managers and customers are not going to like hearing the truth

Estimates are going to sound long and expensive, and you will be pushed to reduce them again.

Don’t.
Don’t back down.
Stick to your guns.

The real problem with estimation is not that we suck at it.
The problem is we are forced to cut corners and revise to unrealistic numbers that “sound good” to the customer’s ears.
It never works, and always blow out, and then the shit hits the fan, and stress increases as projects run over time and developers are coerced into working stupid overtime.

If we just do the right thing in the first place and communicate what’s real, everyone knows where they stand and everyone will be happy in the long run.

A Git Strategy

Background

Over the years, I’ve worked on a number of different projects with different Git branching strategies. I’ve also wasted many hours sitting in meeting arguing over what should be a relative non-issue.

The beauty of being the bloke in charge is sometimes you get to skip all the bullshit and just dictate the approach.
Or to be correct in this case, sometimes the approach is dictated for you.

Working remotely with developers who were essentially new to Git and were already facing a lot of learning and change, I found their actions have driven my Git process decisions.
Which is good:

You want to make business and development processes as easy as possible for everyone.

After all, complexity is the enemy of productivity.

I started with GitFlow, which has worked well in the past, but ended up simplifying if further.


The Strategy

The Git “Pilot”

One person is designated responsible for reviewing and managing a repository.
All developers should be capable of doing this role – and the role may rotate between developers – but at any point in time one person is the designated “pilot” in control and responsible for the repository.

Workflow

Normal feature development

  • A working branch is created from develop.
  • When work is complete it is merged back into develop via a Pull Request.
  • A release is created.
    • A version number is generated an applied at the start of this process.
    • A new release branch named “release/release_{version}” is created from master.
    • develop is merged into the release branch.
  • The release goes through test environments.
    • Note: Only 1 feature release branch is tested at a time. This reduced management complexity.
    • If a fix is required:
      • A working branch is created from the release branch.
      • The working branch is PR merged back into the release branch.
    • If a production hotfix occurs during this process, develop is merged back into the release branch.
  • A release completes testing and is published to production.
    • Assuming any production hotfixes have already been merged into develop and the release branch.
    • The release branch is merged into master.
    • The release branch is merged into develop (to ensure any fixes are available for continued development).

Hotfixing production issues

  • A working branch is created from master.
  • When work is complete, a release branch is created from master (same versioning and naming process at normal feature development) and the feature branch is merged into the release branch.
  • The release goes through testing.
  • When testing is complete:
    • The release branch is merged back into master.
    • The release branch is merged into develop.
      develop then needs to be merged back into any working branches, and feature release branch currently in test.

Version Numbers

  • Use the format {yyyy}.{mm}.{dd}.{HHmm}
    • {yyyy}: The current 4-digit year at UTC.
    • {mm}: The current 2-digit month at UTC.
    • {dd}: The current 2-digit day at UTC.
    • {HHmm}: The current 24-hour hour and minute at UTC.
    • Example: 2018.02.22.2158
  • Version number is applied as soon as a release is generated.
  • I don’t care about identifying alpha’s, betas, fixes, or otherwise. A release is a release. Use release notes to document details of what is going into a release.

Core Branches

Required:

  • master: The current production code.
  • develop: The current code being developed and tested.
  • release: Each release starts in its own branch.

Optional:

  • feature: Optional node for developer to create working branches under.

Working Branches

Developers can optionally create working branches (known as “feature” branches in GitFlow) under a feature node (e.g. feature/jason_my_work), or directly off the root – at the same level as master, develop, and release.

This “either or” approach came about because my developers were forgetting to create working branches under feature.
In reality this is not a problem in any way and, if anything, made them easier to find and access, so I’m happy for them to stay there.
Good repository maintenance will handle any clutter issues.

Branch Maintenance

After merging working branches back into develop, keep the branch for a “period of time” – generally through testing – we’re happy all code is included and complete.
Periodically delete old working branches.

Release Notes

Each release should contain notes identifying:

  • The type of release – e.g. scheduled feature release, production hotfix, security patching, etc.
  • A summary of changes included in the release.
  • Identify any breaking changes.